Ever felt the endless grind of mining for cobblestone in Minecraft? What if you could build a system that churns out an infinite supply of blocks while you relax, plan your next mega-build, or simply sip on some pixelated tea? That's the magic of Basic Cobblestone Generator Designs. These ingenious contraptions transform two common liquids – water and lava – into a renewable resource, freeing you from the pickaxe purgatory and unleashing your inner architect.
Forget scavenging the depths; with a properly constructed generator, you'll have more cobblestone than you know what to do with, ready for anything from grand castles to humble pathways. Let's dig into how you can make this essential Minecraft utility a reality.
At a Glance: Your Cobblestone Generator Blueprint
- What it is: A system that uses water and lava to endlessly create cobblestone (or stone).
- Why you need it: Provides unlimited, renewable building blocks, saves mining time.
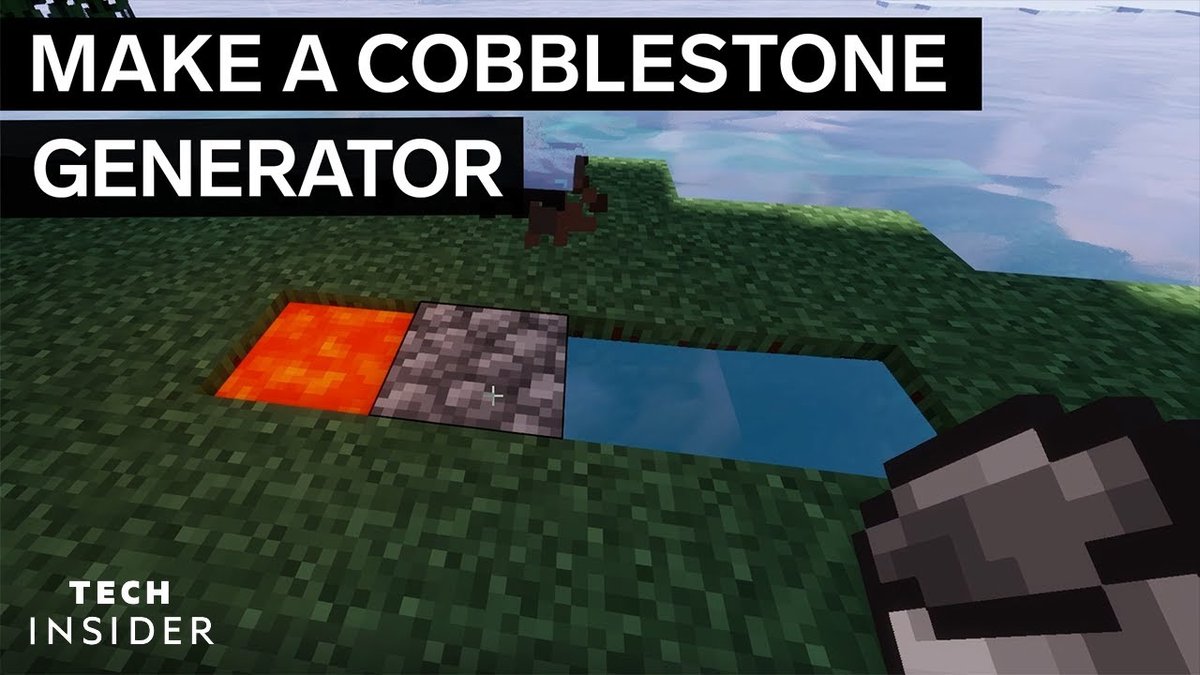
- Core Mechanic: Flowing lava meeting flowing water generates cobblestone.
- Stone vs. Cobblestone: Some designs can produce stone if you use a Silk Touch pickaxe; otherwise, it’s cobblestone.
- Four Main Designs: From super simple to fully automated, catering to all resource levels and needs.
- Key Materials: Water buckets, lava buckets are essential; pistons, redstone, and hoppers for more advanced designs.
The Infinite Block Secret: Understanding Cobblestone Generators
At its heart, a cobblestone generator exploits a fundamental interaction within Minecraft: when flowing lava meets flowing water, it creates a cobblestone block. This isn't just a quirky game mechanic; it's the bedrock (pun intended) of an entire category of farms that revolutionize resource gathering.
Why You Need an Infinite Cobblestone Supply
Think about your grandest Minecraft projects: massive fortresses, intricate redstone circuits, or even just expanding your humble starter base. All require vast quantities of solid blocks. While dirt and wood are plentiful, cobblestone offers durability and a distinct aesthetic. Relying on traditional mining is slow and tedious. A cobblestone generator, however, provides:
- Unlimited Resources: Once built, it never runs out.
- Convenience: Blocks are generated in a predictable, accessible location.
- Automation Potential: Advanced designs can even mine and collect blocks for you.
- Early Game Power: Even the simplest designs are game-changers for new worlds or challenge maps like Skyblock.
The Magic Behind the Blocks: Water & Lava Interactions
Understanding how water and lava behave is crucial to building any generator. Here’s the essential chemistry:
- Flowing water over still lava source = Obsidian. Think of lava as being "quenched" rapidly.
- Flowing lava touching still water source = Stone. Here, the lava is cooled but still has room to solidify into a smoother texture.
- Flowing lava and flowing water together = Cobblestone. This is our sweet spot! When both liquids are in motion and meet, they produce the rough, classic cobblestone block.
This fundamental principle allows us to design controlled environments where these interactions consistently happen, giving us our endless supply.
Cobblestone vs. Stone Generator: A Subtle but Important Difference
You'll often hear these terms used interchangeably, but there's a distinction worth noting. Most basic generators inherently produce cobblestone. However, certain designs – specifically Methods 2 and 3 that we'll explore – are versatile enough to be considered stone generators. This means if you break the generated block with a pickaxe enchanted with Silk Touch, you'll get actual stone blocks, not cobblestone. Without Silk Touch, or with a Fortune enchantment, these same generators will yield cobblestone. Simple generators (like Method 1) are always cobblestone farms.
Choosing Your Block Factory: Design Methods Explored
The right cobblestone generator depends on your resources, your stage in the game, and your desired output. We'll cover four distinct methods, from the absolute simplest to a high-volume, fully automated behemoth.
Method 1: The Starter's Special – Simple & Speedy Cobblestone
This is the bread and butter of early-game resource generation, particularly vital in maps where resources are scarce, like Skyblock. It's incredibly easy to build, requiring minimal materials, though its efficiency is quite low, meaning you'll be mining blocks one at a time.
Why It's Great for Beginners:
- Easiest to build: Minimal blocks, quick setup.
- Low resource cost: Only two buckets needed.
- Perfect for early game: Gets you started without complex infrastructure.
Materials You'll Need:
- 1 Water Bucket (or 1 Ice block)
- 1 Lava Bucket
Step-by-Step Construction:
- Dig the Trench: Start by digging a simple hole that is 4 blocks long, 1 block wide, and 1 block deep.
- Create the Gap: From one end of the trench, count two blocks in and break that second block. This creates a small gap in the middle of your 4-block trench.
- Place the Water: At the end of the trench closer to the broken block, place your water bucket. If you're using an ice block, place it and then break it to release the water. The water should flow into the gap.
- Introduce the Lava: At the other end of the trench (2 blocks away from the broken block), place your lava bucket. The lava will flow and meet the water in the gap.
- Watch It Form: A cobblestone block will continually generate in that middle gap. Mine it, and a new one will appear!
Pitfalls to Avoid:
- Incorrect placement: If water and lava are placed incorrectly, you might get obsidian or just a mess of flowing liquids. Ensure they meet in the middle.
- Efficiency: You'll need to manually mine each block. This design is not for high-volume production.
Method 2: The Crowd Pleaser – Popular Design with Collection
This design is a significant upgrade from Method 1, offering better efficiency and, crucially, an integrated item collection system. It's also one of the designs that can produce actual stone with a Silk Touch pickaxe. It’s a popular choice for survival worlds once you have access to iron for hoppers.
Why It's a Fan Favorite:
- Better efficiency: Faster block generation compared to Method 1.
- Automated collection: Hoppers funnel mined blocks into chests.
- Versatile: Can generate stone or cobblestone.
- Expandable: The collection system can be scaled for more storage.
Materials You'll Need:
- 2 Water Buckets
- 1 Lava Bucket
- 5 Stairs (inflammable material, e.g., stone, cobblestone, brick)
- Solid blocks (inflammable material)
- 5 Hoppers
- 2 Chests (for a double chest)
- 1 Sign
Step-by-Step Construction:
- Start with Storage: Dig a 1x1 hole and place a double chest (two chests side-by-side) in the ground. This is where your blocks will end up.
- Hook Up the Hoppers: Connect 5 hoppers so they all funnel into the chest. The crucial one is the hopper directly above the chest, facing down into it. Then, connect the other four hoppers into that central hopper.
- Create the Base: Surround the hoppers and chest with solid, inflammable blocks. This forms a protective base.
- Place the Stairs: On top of the solid blocks directly above the hoppers, place your 5 inflammable stairs. These will hold the water.
- Build the Second Layer: Place more solid blocks on top of all the bottom solid blocks, effectively creating a second layer around your stairs.
- Add the Sign: Place a sign on a solid block directly above the chest. This sign will help contain the water flow and can be at player head level.
- Waterlog the Stairs: Use your water buckets to waterlog the stairs. Ensure the water flows but doesn't spill out of your enclosed area. Place more solid blocks above the stairs, other blocks, and the sign to form a third containing layer.
- Introduce the Lava: Place your lava bucket one block directly above the flowing water, in the center of your setup. The lava will flow down and interact with the water, generating blocks.
- Start Mining: Stand on the chest and begin breaking the generated stone blocks. They will automatically be collected by the hoppers and stored in your chest.
Pro Tip:
- For continuous mining, you can hold down your mouse button (or relevant control) and let the blocks flow into your chest. For an even deeper understanding of how these mechanisms work, you can always Learn to make a cobblestone generator with more advanced techniques.
Method 3: The Workhorse – Piston-Powered Cobblestone
This design introduces pistons and redstone, pushing generated cobblestone towards the player. While more complex to build than Method 1, it's incredibly reliable and can be scaled by adding more modules or an attached collection system. This is also a stone generator.
Why Go Piston-Powered?
- Automated pushing: Blocks are pushed into a convenient mining spot.
- Reliable: Once built, it runs consistently.
- Expandable: You can add more pistons for longer rows of blocks.
- Can be a stone generator.
Materials You'll Need (for one module):
- 2 Water Buckets
- 1 Lava Bucket
- 8 Pistons
- 2 Redstone Torches
- 1 Redstone Repeater
- 11 Redstone Dust
- 5 Stairs (inflammable)
- Solid Blocks (inflammable)
- 1 Lever
Step-by-Step Construction (One Module):
- Water Chamber Base: Place 5 inflammable stairs in a line and surround them with solid blocks to form a container.
- Waterlog: Waterlog the stairs. The water should fill the stairs without spilling over the solid blocks.
- Upper Containment: Place solid blocks on top of the stairs and on the edges of your base, forming an enclosed channel for the water.
- Lava Channel Extenders: Add 2 more solid blocks on either end, extending away from the stairs.
- Connect for Lava: Connect these two extended ends with more solid blocks, forming a ring. This creates a channel where lava will flow.
- First Redstone Torch: On one side, break a block diagonally downwards from a stair. Place a redstone torch in this hole.
- First Piston: Place a piston diagonally upwards from the redstone torch, facing towards the water channel.
- Redstone Dust 1: Place a solid block attached to this piston and 1 redstone dust next to it.
- Piston Line: On the opposite side of the water channel from your first piston, place 8 pistons in a row, all facing towards the water channel.
- Redstone Line: Place solid blocks directly behind these 8 pistons and cover them with redstone dust.
- Second Redstone Torch: Break a block diagonally downwards from the last piston in the row of 8. Place a redstone torch in this hole.
- Repeater & Connection: From this second redstone torch, place 2 more redstone dust, followed by 1 redstone repeater (set to default delay), and then 2 more redstone dust. This line should connect to the redstone dust you placed behind the row of 8 pistons, completing your redstone circuit.
- Add Lava: Place your lava bucket one block above the first piston (the single one) and in the center of the ring you created.
- Activate! Place the lever on the solid block attached to your first single piston. Flip it to activate the generator. The pistons will now push generated blocks. To stop the mechanism, simply activate the lever again.
Scaling Up:
- You can extend the line of 8 pistons and their redstone behind them, adding more segments to push blocks further or into a larger collection area. Just ensure your redstone signal reaches all pistons.
Method 4: The Block Beast – Fully Automated Cobblestone Generator
This is where things get serious. For the true block connoisseur, this design combines a fast cobblestone generator with a TNT duper and an Etho hopper clock for fully automated, high-speed block destruction and collection. It's complex, resource-intensive, and requires careful construction, but the payoff is immense.
Why Go Fully Automated?
- Highest efficiency: Generates and mines blocks extremely fast.
- True "set it and forget it": Once built, it runs without player interaction.
- Massive output: Designed for large-scale projects.
Crucial Warning: Lava Deletion Risk
This generator is fast but carries a risk: if the regular pistons reach their full push limit (pushing 12 blocks) and are still activated, they can delete the lava source block. To prevent this, always deactivate the generator using its lever before the pushed block line gets too long. If lava is deleted, you'll need to manually refill it.
Materials You'll Need (Approximate):
- Water Buckets (at least 2)
- Lava Buckets (at least 1)
- Leaves (~40 blocks)
- 7 Sticky Pistons
- 5 Regular Pistons
- 5 Target Blocks
- 2 Observers
- 1 Block of Redstone
- 2 Redstone Comparators
- 3 Redstone Repeaters
- 6 Slime Blocks
- 1 TNT Block
- 1 Fence (any type)
- 1 Dead Coral Fan
- 1 Detector Rail
- 1 Minecart (any type)
- 3 Fence Gates (any type)
- Redstone Dust (a stack or more)
- Solid Blocks (inflammable, e.g., stone, cobblestone, obsidian - lots!)
- Obsidian (~1.5 stacks for blast containment)
- 2 Levers
- 2 Slabs (top-half, any type)
- Chests (many, for storage)
- Hoppers (at least 3, for initial collection)
- 1 Stair (for collection chest access)
Step-by-Step Construction:
This is broken into four major parts: the generator itself, the TNT duper, the Etho hopper clock, and the collection system.
Part 1: The Generator Core
- Piston Line: Place 5 regular pistons in a row, all facing towards where your collection system will eventually be.
- Water Source: Place 5 leaves on top of these pistons and waterlog each leaf block.
- Lava Channel Base: Place solid inflammable blocks on top of the waterlogged leaves. Extend this line by one block on either end.
- Lava Ring: Build a 1-block wide ring of inflammable blocks around the previous line, creating a channel directly towards the pistons. This is where your lava will sit.
- Observer 1: On one end of this lava ring, one block below and in the center of the channel, place an observer looking towards the leaves.
- Redstone Power Block: Put a solid block directly behind this observer.
- Sticky Piston Line: Diagonally downwards from your regular pistons, place 5 sticky pistons facing upwards.
- Target Block Trench: Adjacent to these sticky pistons, dig a 5-block long, 1-block wide hole. Place 5 target blocks in this hole.
- Redstone Line 1: Next to the target blocks, dig a 6-block long, 1-block wide hole (starting opposite the observer you placed earlier). Fill this trench with redstone dust.
- Connect Redstone: Place redstone dust under the solid block attached to your observer (from step 6) and connect it with the redstone dust line next to the target blocks.
- Piston Back Support: Place solid blocks attached to the side of the regular pistons at the back.
- Redstone Line 2: Place redstone dust on these support blocks and extend this line with 2 more redstone dust blocks towards the other redstone dust line.
- Repeater Delay: Connect these two redstone lines with a redstone repeater facing towards the line behind the pistons, set to 2 ticks delay.
- Generator Lever: Place a lever attached to the redstone line before the repeater. This is your primary switch to disable the generator.
- Add Lava: Carefully place your lava bucket into the ring you built.
Part 2: The TNT Duper
This ingenious contraption creates an endless supply of TNT without consuming any from your inventory.
- Obsidian Anchor: Exactly 12 blocks out from the center of your regular pistons, place an obsidian block a couple of blocks down. Dig a large pit around it for your collection system later.
- Pillar Up: From the obsidian block, pillar up 15 blocks with any temporary block.
- Slime Block L-Shape 1: Diagonally upwards from the top pillar block, place an L-shape made of 3 slime blocks.
- Fence Post: Attach a fence block to the topmost slime block.
- Slime Block L-Shape 2: Adjacent to the fence, place another L-shape using 3 more slime blocks.
- Detector Rail & Minecart: Place a detector rail on the slime block directly attached to the fence, and then a minecart on top of the rail.
- TNT & Coral Fan: Place a TNT block under the fence. Then, attach a dead coral fan to the slime block next to the TNT.
- Sticky Piston (TNT): Attach a sticky piston to the slime block next to the detector rail, facing towards the rest of the TNT duper. This piston will push the TNT.
- Leaf Platform (5x5 Vertical): Build a 5x5 vertical platform of leaves. The top center block of this platform should be attached to the slime block that is one block below the one attached to the sticky piston.
- Leaf Armchair Base: From the bottom center block of your 5x5 leaf platform, build a 2-block long, 5-block wide platform. Add 2 more leaf blocks on either side (making it look like a big leaf armchair). This shape holds water.
- Water Containment (Fence Gates): Place 3 fence gates diagonally upwards from the edge of the leaf blocks (not attached directly to them). These will hold the water.
- Water Fill: Temporarily remove the 3 leaves in the "armchair" and place solid blocks. Add water to the corner of the leaf armchair. Then, replace the solid blocks with the leaves.
- TNT Stopper: Attach a solid block to the center fence gate. This prevents the TNT from gaining too much momentum.
Part 3: The Etho Hopper Clock
This mechanism controls the timing of the TNT blasts.
- Hopper Clock Base: Place 3 solid blocks in a row, attached to the TNT duper’s sticky piston. Break the 2 closest to the sticky piston.
- Observer 2: Place an observer facing into the remaining third solid block. Then, remove the solid block the observer was facing into.
- Permanent Solid Blocks: Diagonally downwards from the observer, place 2 permanent solid blocks in a row.
- Hoppers: Adjacent to the last solid block, place 2 hoppers connected to each other (one feeding into the other).
- Comparator & Repeater 1: Place 2 solid blocks diagonally downwards from one hopper. Place a redstone comparator on the block closer to the hopper (it reads the hopper contents). Place a redstone repeater on the other block.
- Redstone Dust 3: Place a solid block attached to the repeater with redstone dust on top.
- Slab & Redstone: Attach a top-half slab to that redstone dust with more redstone dust on it.
- Sticky Piston (Clock): Attach a sticky piston to that slab, facing towards the hoppers.
- Mirror Setup: Repeat steps 5-8 on the other side of the hoppers, mirroring the setup.
- Redstone Block: Place a redstone block on top of one of the hoppers.
- Timing Items: Fill the other hopper with exactly 4 items (any non-stackable or stackable items work, 4 is for quick switching).
- Connect Observer to Clock: Add 2 redstone dust between the observer (from step 2) and the hopper clock setup.
- Clock Disabler: To disable the hopper clock, power the redstone dust that the observer is facing towards (e.g., with a lever attached to that block, or connect it to your master switch).
- Final Block (Clock): Place the last solid block between the observer and the sticky piston from the clock.
Part 4: The Collection System
This ensures all those newly blasted blocks end up safely in your storage.
- Collection Platform: Underneath the obsidian block (from your TNT duper), create an 11x11 solid block platform.
- Blast Wall: Surround this platform with a 2-block tall obsidian wall to contain TNT explosions.
- Water Flow Channel: Along the bottom of the platform, on the side closest to your generator, create a 2-block wide, 11-block long platform.
- Outer Water Sources: Place water sources along the obsidian wall on your main 11x11 platform. The water should flow inward.
- Inner Water Trench: Dig a 1-block deep hole along the edge of the platform, just before the water stops flowing.
- Water Current: Place a water source on the end of this inner trench opposite where you want your chests to be. This will create a current.
- Extend Trench: Extend the 1-block deep hole by digging one more block just before the water stops flowing again.
- Hoppers & Chests: At the very end of this extended trench, place a hopper facing into a chest. Chain multiple hoppers and chests together for a truly massive storage system.
- Chest Access: Place a stair block above the hopper-fed chest. This allows you to open the chest even with hoppers on top, and it also helps prevent items from bouncing out.
Troubleshooting Your Cobblestone Creations
Even master builders run into snags. Here are some common issues and how to fix them:
- "Why isn't it working?"
- Water/Lava Misplacement: The most common culprit. Double-check that flowing lava meets flowing water for cobblestone. If you get obsidian, your lava source is being hit by flowing water from above. If you get stone, flowing lava is hitting a still water source.
- Inflammable Blocks: Is anything in your generator catching fire from the lava? Ensure all structural blocks directly exposed to lava are inflammable (stone, cobblestone, obsidian, netherrack, etc.).
- Redstone Errors (Piston/Automated designs): Check all redstone dust, repeaters, and torches. Is the signal reaching all components? Are repeaters facing the correct direction and set to the right delay?
- "My lava disappeared!"
- This is a specific risk with Method 4. If pistons push blocks too far (12 blocks) and are still active, they can delete the lava source. The best prevention is to always turn off the generator with its lever before the block line gets too long. If it happens, you just need to replace the lava bucket.
- "It's too slow!"
- Method 1: It's inherently slow. Upgrade to Method 2 or 3 for better output.
- Method 2/3: Ensure you're using an efficient pickaxe (Efficiency V). Consider adding more modules (for Method 3) or upgrading to the fully automated Method 4 for truly high-speed production.
- "Items aren't collecting!"
- Hoppers: Double-check that all hoppers are facing into the next hopper or chest. Hoppers have a distinct "spout" that indicates their output direction.
- Full Chests: Your chests might simply be full! Expand your storage system.
Maximizing Your Yield: Best Practices for Cobblestone Farming
Building the generator is just the first step. To truly optimize your block output, consider these best practices:
- Enchantments are Your Friends:
- Efficiency V: On your pickaxe, this makes mining incredibly fast, especially for manual generators.
- Fortune III: If you're okay with pure cobblestone, Fortune III will significantly increase the amount of cobblestone drops per block mined (though it doesn't affect stone from Silk Touch).
- Silk Touch: Essential if you want actual stone blocks from compatible generators (Methods 2 & 3).
- Robust Collection Systems: For any generator beyond Method 1, invest in a good hopper and chest system. For massive farms, look into more advanced item sorting and storage.
- Lighting & Safety:
- Light it up: Place torches or other light sources around your generator to prevent hostile mobs from spawning, which can interfere with operations or damage components.
- Inflammable Materials: Always use inflammable blocks for the generator structure, especially near lava.
- Blast Resistance: For automated TNT duper farms, use obsidian or blast-resistant blocks for critical components and surrounding collection areas.
- Scalability: Don't be afraid to build multiple simpler generators or expand piston-based ones. Sometimes, several small, reliable setups are better than one temperamental mega-farm, especially for beginners.
Beyond Cobblestone: Generating Other Resources
While this guide focuses on cobblestone, the underlying principle of water and lava interaction can be tweaked to produce other blocks:
- Stone Generators: As mentioned, Methods 2 and 3 can be stone generators if you use Silk Touch.
- Basalt Generators: A less common but fascinating variant involves soul soil, blue ice, and lava. This produces basalt, a unique dark block.
- Obsidian Farms: By allowing flowing water to hit still lava sources, you can create obsidian. While slower, it's a way to get this blast-resistant block without deep-mining.
Your Infinite Block Supply Awaits
Whether you're just starting your Minecraft adventure or you're a seasoned builder planning your next epic creation, mastering Basic Cobblestone Generator Designs is an invaluable skill. From the simplest hole in the ground to a fully automated block factory, these contraptions represent the ingenuity and endless possibilities within Minecraft.
So grab your buckets, gather your materials, and get ready to build. No more endless mining trips; with your new generator, you'll have an unlimited supply of blocks, freeing you up to focus on the fun parts of building and exploring. The only limit now is your imagination. Happy crafting!